Antique Vise Restoration, Start to Finish
Old vises are built like tanks, but rust and grime can lock them up and hide casting details. A careful restoration brings back function without erasing history.
What you’ll get:
- A simple, repeatable process for de-rusting and reviving an antique vise
- Practical cautions to avoid damage
- Notes on using a compact die grinder for cleanup
Tools & Materials
Triage before you touch a bolt
Check for cracks in the body, bent lead screw, and missing jaws or springs. Photograph the vise assembled so you can match orientation later. If the screw turns, back the jaw fully out before disassembly; if it’s seized, soak the screw and guide surfaces first so you’re not forcing cast iron.
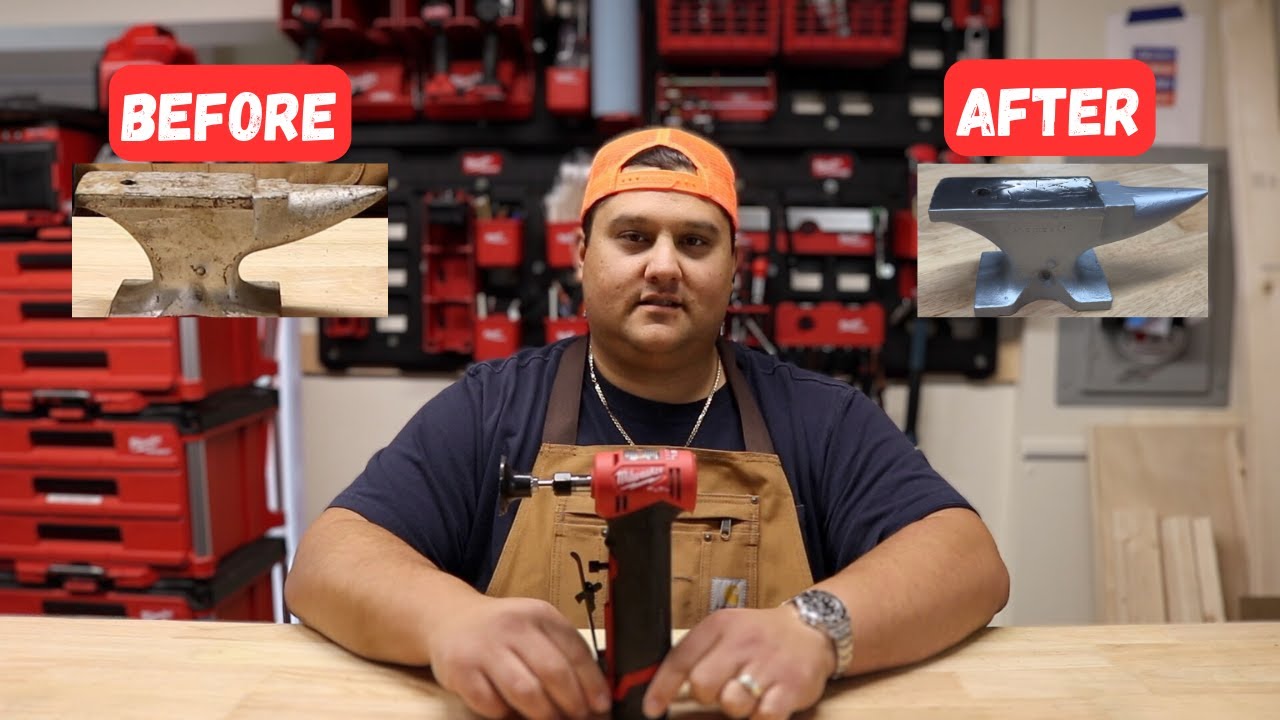
Rust removal that preserves details
Choose a method that respects crisp edges and stamped marks. For heavy scale, start with a scraper, then a wire wheel. Keep pressure light—let the wheel do the work to avoid rounding corners. On threads and keyways, switch to hand tools or a soft abrasive so you don’t mushroom edges. Rinse or wipe between steps so loose oxide doesn’t scratch.
Controlled grinding and cleanup
A compact die grinder shines for gasket faces, tight corners, and jaw pockets. Use small diameter abrasives to keep contact precise, and stay off mating threads. Work in passes: touch, inspect, cool. Heat is the enemy of temper and paint later, so keep the tool moving and pause frequently.
Reassembly and protection
Dry-fit parts first to confirm smooth travel. If anything binds, the culprit is usually a burr or packed debris in the nut or screw threads—clean, don’t force. Once motion is right, add a thin film of lubricant on the screw and sliding ways. Finish with a protective coating suited to shop use so fingerprints and humidity don’t restart corrosion.
A measured approach restores function and character without over-polishing. Take your time, remove only what the rust added, and your Made in USA vise will earn a fresh lease on shop duty.