Milwaukee Packout Wall: Real-World Garage Setup
If your garage feels scattered, a Packout wall system can turn chaos into zones for tools, fasteners, and outdoor gear—without committing to a fixed layout.
What you’ll get:
- A simple mounting approach with 1x4 strapping and cabinet screws
- Layout tips, expansion ideas, and a couple of gotchas to avoid
Tools & Materials
Mounting that survives real use
Using 1x4 strapping lets you hit irregular studs and avoid a dozen drywall holes. Mark studs with painter’s tape instead of pencil so you can adjust without cleanup. Pre-drill the strapping to match your stud layout, then fasten the boards securely before hanging the plates.
If lag sizes don’t match the plate holes, don’t force it—swap fasteners. GRK cabinet screws bite fast and hold well in framing, making them a solid alternative when the exact lag spec isn’t on hand.
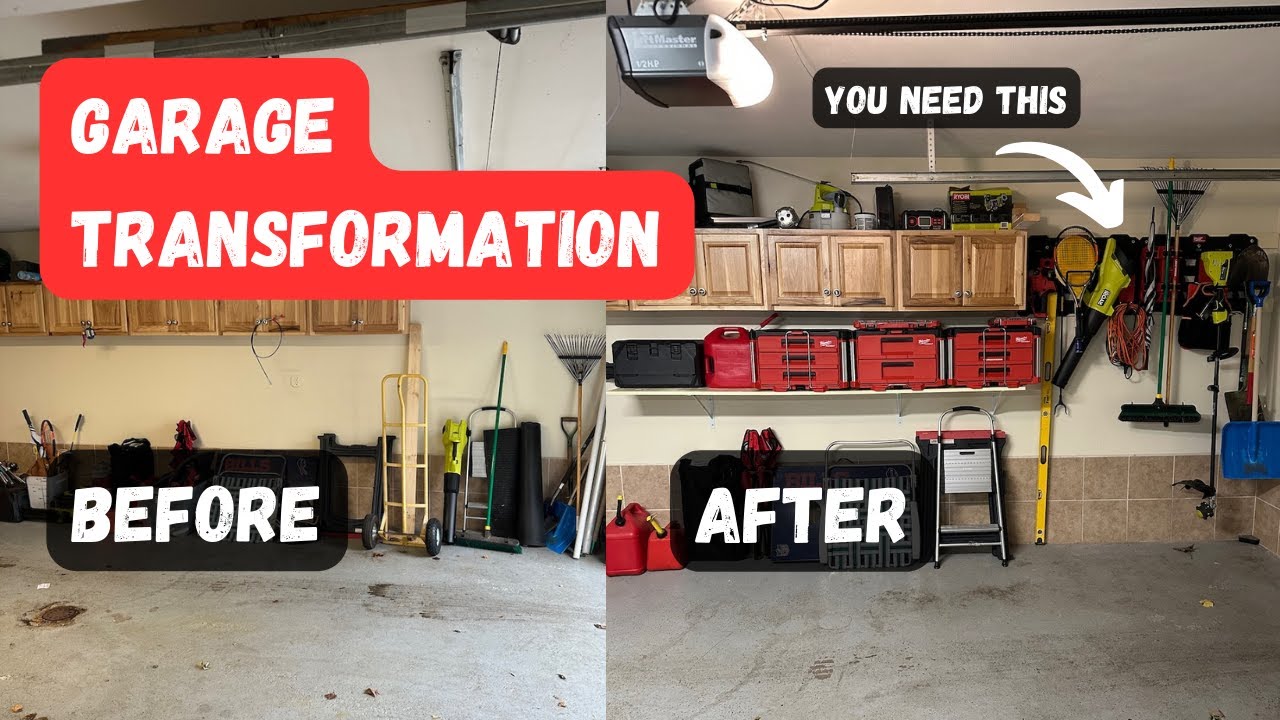
Two large plates, 60 inches of win
Two Large Milwaukee Wall Plates side by side land right around 60 inches. Center them on your strapping and overbuild the connections—aim well beyond the “no less than four screws per board” guidance. A tight install keeps accessories from wiggling and protects your drywall.
Keep the top row open for future add-ons. Crates or cabinets can live high for rarely used items, while daily-use tools ride in the middle zone for reach.
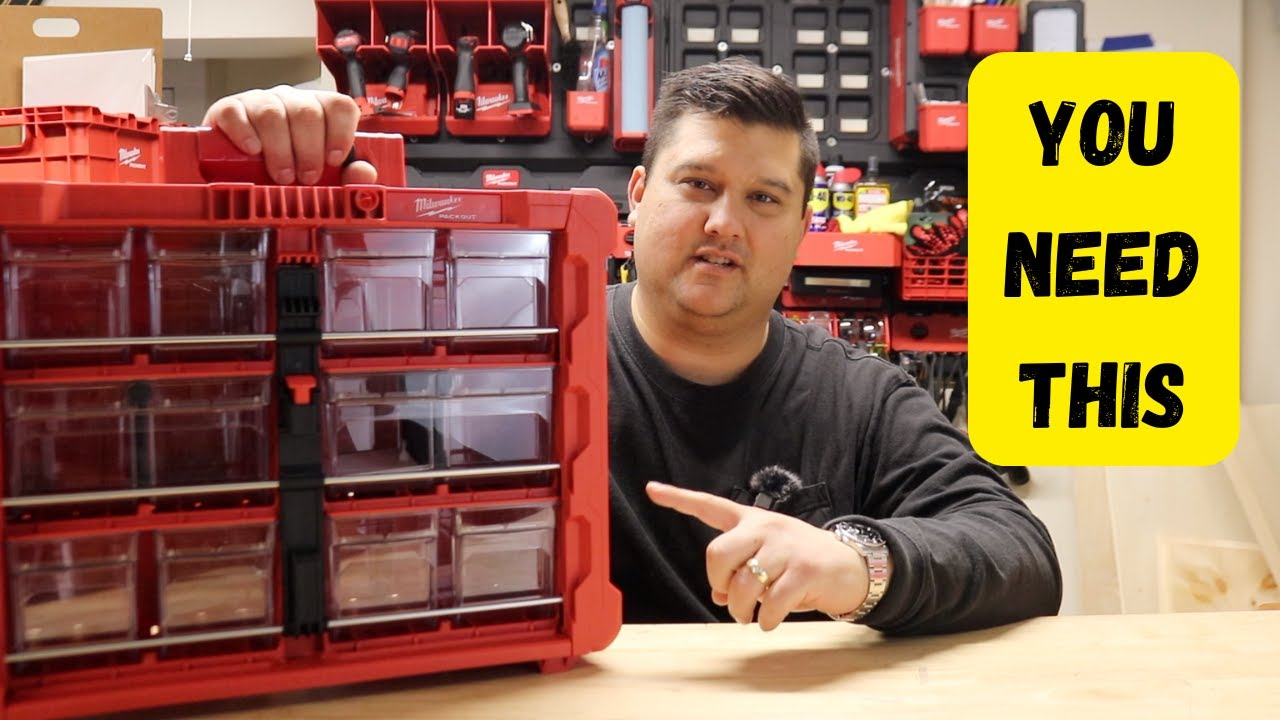
Accessory picks that punch above their weight
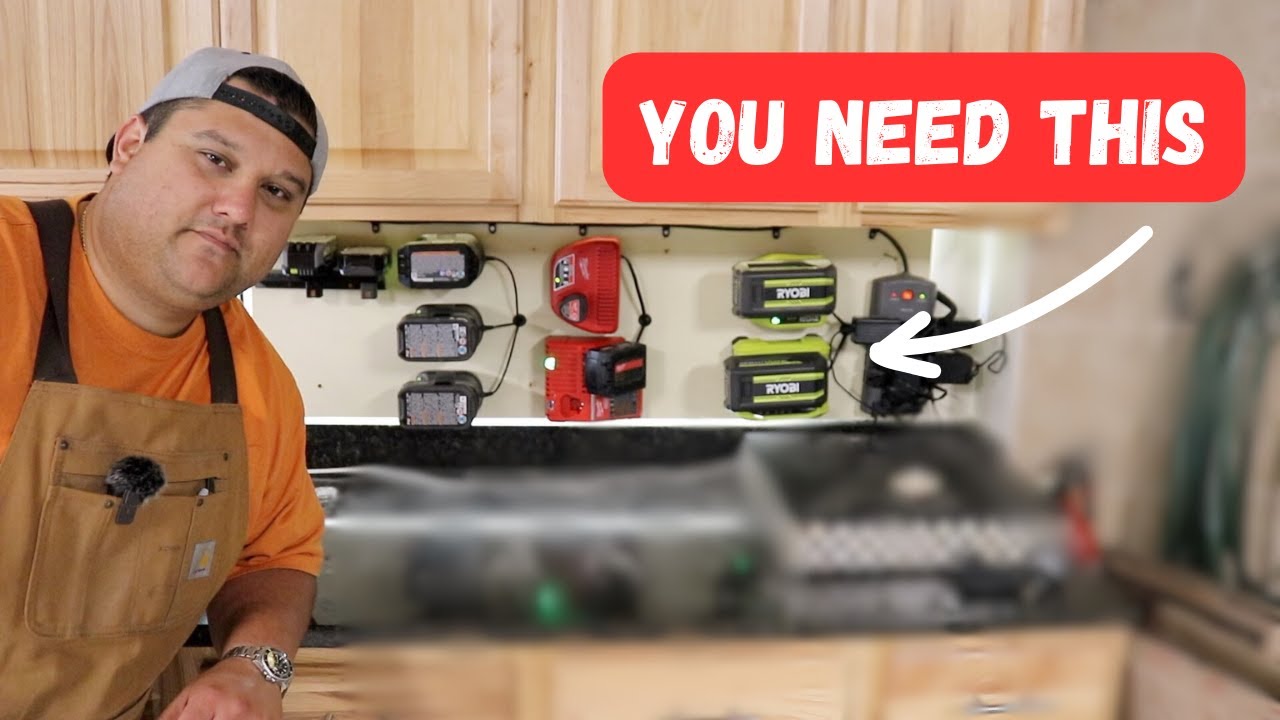
The cup holder doubles nicely for pens and markers. A paper towel holder works great for tapes; grab a second for actual towels. Battery holders that click in keep M12 packs from walking off the wall.
For drivers and drills, a multi-slot tool holder with a small tray below corrals a bit kit. Shelves take label makers and chargers; route power to a nearby outlet and leave airflow around chargers.
Small quirks to know
Some small storage cups don’t span the full rail, so they can shift left-right. If visual alignment bugs you, place them in clusters or reserve those spots for wider accessories. Skip a center strapping board if your top and bottom runs are robust and well-fastened.
Expand cleanly, not loudly
Plan a second row of wall plates up top for baskets or crates. Group outdoor tools (rakes, mallets) on hooks to free floor space and keep debris off shelving. Add dust collection later—drilling the layout now pays off immediately.
Final takeaway: A Packout wall with 1x4 strapping and GRK cabinet screws is a fast, modular upgrade. Start with two large plates, over-secure your boards, and let the system evolve with your workflow.